About us: at PhotoManhattan we've been offering excellent photography instruction,
photo rentals and exhibit space in Manhattan, NYC, since 2003. More...
DIY Product Photography Tutorial - Framing
At PhotoManhattan, we offer you all the resources and tools that you'll need to guide you on how to take product photographs for your website, images for your blog, or online store quickly and efficiently. Whether you sell services or tangible products such as hand made crafts, apparel and textile, jewelry and flowers, or food, or if you plan on taking product photos for Etsy or taking pictures for Ebay or Amazon, we have the right solution for you.
Find quick tips and tricks, free online tutorials or even more personalize assistance. We will even deploy our pros to your location to train your staff in just a few hours with any equipment that you already have (iPhone or DSLR). Select what works for you:

1- Free Online tutorials: Get started right away with free online product photo tutorials that will guide you through the tips and tricks to immediately apply to your photography for Etsy, Ebay, Amazon, or your website or blog Find below.
2- Remote assistance (New!): Schedule a 30min remote session with one of our pros to assist you in your next photo shoot. Request date, time, topic.
3- Live Webinars: Take a 4-5 hour interactive Webinar and have your questions answered live.
Find upcoming webinars. (Makeup, food styling, Real estate, and more)
4- Private Tutoring: Book a tutor to your location within Manhattan, NYC. Schedule any time within 48 hours, customize topics to your specific needs. View availability.
5- Crash courses: Take a one time crash course at our studio and learn how to take product photos with hands on practice & equipment management. Find upcoming workshops.
Today's tutorial - Framing & Staging for your product photos
Get started with these tips below:
1- Framing, Staging, Styling - Visualize
Background and props: Backgrounds don't have to be white or black; if your online platform allows for it, you can use real life backgrounds and props to emphasize your brand and the 'mood' or message that you would like your product convey.  
If you fancy a white background your photos can also look fantastic. Consider using the walls, fabric, tracing paper, translucent curtains. (More details at the bottom).

In your composition, be mindful of the props to ensure that it is clear which product it is that you are showcasing. You can emphasize the main item through:
- lighting (the brightest one),
- its proximity to the camera (the closest one) and,
- its sharpness (vs blurriness).

In the images below, you can see an example as how the coffee beans are emphasized over the coffee cup because the sharp focus is on the beans. The same principle applies for the brightest and closest products.

Sharpness vs Blur: Blurring out the background is a good technique to place emphasis only on the product or parts of the product that you'd like to emphasize. To get this effect, If you shoot in automatic and cannot alter the camera settings significantly to achieve the blur that you are looking for (or if you are already shooting in manual but the level of blur is not enough), you can use these tricks to increase blur:
- use the zoom instead of a wide angle.
- bring the product as far from the background as possible.
- Reduce the power of the lights. If the lights don't have a dimmer, reduce their power by either pulling them further away from the product, add more diffusion to them, or bounce them into a surface instead of pointing them directly towards the product or light tent.
If you are shooting in Manual mode you need to set your camera to a wide aperture or F-Stop and do a few tests with different apertures to determine what level of blur works best for you.
Framing and details: often times the photo looks good while you are shooting it, but not so good when you transfer it to the computer due to either the composition being off, or there being simply a scratch or dirt / dust in your product. Once you are done setting the lights take a few seconds to visualize the frame as it would look on the final image. Move the products around until you get the composition that looks best to you.

Then, spend a few minutes styling the shot by cleaning up the products and checking the background. You'll be amazed at how the process of visualization and styling will expedite your overall workflow and spare you the seemingly endless amounts of time spent on reshooting.
2- Use a tripod
The first most common reason to use a tripod is to avoid camera shake which occurs mainly in low light conditions. Minimal camera shake may be unnoticed by the naked eye, but the image will appear to lack sharpness. Steadying your camera on a tripod will prevent this unwanted effect from occurring. Tripods will also allow for imaging effects that would not otherwise be possible such as a long depth of field and motion blur. Using a tripod can also aid with your workflow by allowing you to focus on the set up and keep your framing consistent from shot to shot as needed.

There is a wide variety of tripods available for cameras and phones from very sturdy ones to light weight ones (view more information on our tripod tutorial) . As a quick solution for your next photoshoot, you can place your camera on a table or steady object.
3- The white background
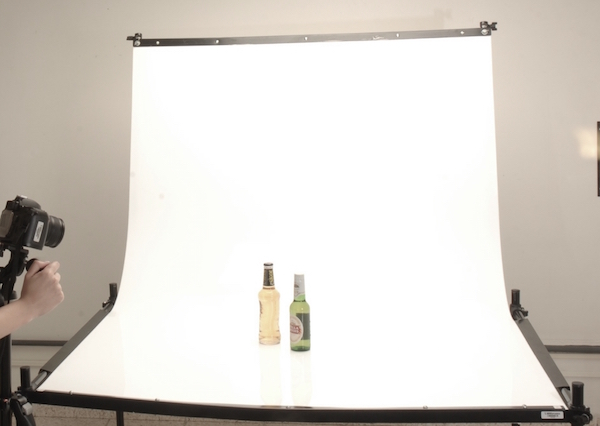
Plain black or white backdrops are popular because they make the product stand out. You can easily create a backdrop using fabric, your window courtains or rolls of white paper found at stationary stores. To avoid a sharp fold showing behind your product, create a curve ('infinity curve') by placing white paper and bending it upwards like in the image below. This will result in a clean, background free of lines.


To create a more defined look, blur out the background:
- 1) set the settings in your camera to create the shortest depth of field (this could be the preset for Portraiture but it depends on your camera model) and/or
- 2) Place the product as far away as possible from the background.
Another popular background tool is using a plexiglass (white, black or clear). This provides the reflections seen on the image below. This options also allows you to project the light from behind the plexiglass towards the product so to create additional lighting effects.
TIPs: Online stores: if you plan on showcasing your product products in sites other than your own, note that online stores have their own guidelines for background colors and props. For example, if you are shooting product photography for Etsy there aren't restrictions at all in terms of background, while photos for Ebay require a plain (free of props) backdrop of any color, and photos for Amazon requires 100% pure white. Be sure to also consult the guidelines of the online store where you are publishing your products.
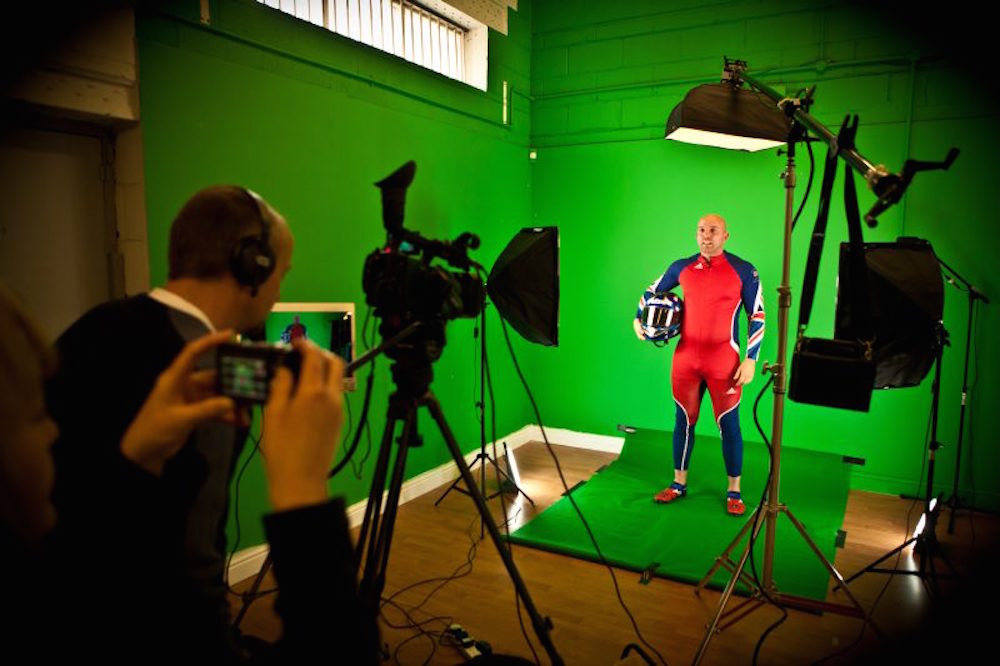
White background: While a 100% white backdrop can be achieved through well manipulated lighting (and ratios), a popular technique and sometimes the best way to take pictures for amazon or to simply expedite this process, is to shoot against a green or blue background. This will allow to easily cut out the background in post processing to all images at once with quick automated actions.
4- Editing and Post processing
High resolution: Most online platforms will have a suggested or limit minimum image sizes and maximum file sizes, with a popular recommended image size of 800-1000 pixels wide. You are best off shooting at high picture size (or "big") so that you can use as needed in the future. If you have your own website, one consideration is making file sizes into an appropriate size to not slow down loading each page.
Editing: at the very minimum you'll need to resize, rename and file your photos. You'll also want to apply basic brightness and color correction, sharpening, cropping and rotation. For this there are several software options like Photoshop and Lightroom which are paid but offer some free versions or free trials, to Gimp and Picasa which are free and cross-platfrom, through iPhoto and any software provided with your camera. Most of these programs have intuitive editing tools that you can experiment with.
Automatization and batch processing: whether you are shooting one product at a time or thousands of products editing can be a daunting task. You might find yourself spending hours in post processing and even reshooting products. It's a good idea to starting automatizing the work flow as early as possible. Most softwares will have batch processing options built in or as separate add ons. Batch processing will allow you to rename, resize, compress, and rotate and file all your photos at once in a single click. Some software, such as photoshop, also allows for auto cropping, straightening, auto contrast and color and plenty of other options.
Shoot with editing in mind: when automatizing your post processing workflow, you'll have to apply the same edits to all of the photos. So your best course of action is to shoot your photos in a way that lighting and framing are consistent and will be suitable for one-fits-all type of edits. These are some points of considerations during shooting:
- Lighting: in scenarios where the software auto brightness contrast or color does not work well, you will want to keep lighting consistent among all images.
- Framing: if you apply auto cropping or straightening, make sure that lighting is not too harsh and that your products are not too far to the edge
- Rotation: if you are rotating on your batch, always tilt the camera to one direction either left or right for all your shots.
5- Take your Product Photography Beyond the Basics
If you have a space online to showcase your products with more freedom, it's fun to get creative with your shots and to get past the 'individual' shots as seen above. Some shots to consider are: detail or texture, group, accessories, wide shot, scale shot, teaser shot. Try emphasizing other aspects or qualities of the product. For the example below (assuming that the main product are the coffee beans), the following aspects or qualities are also showcased:
- Appliances: American coffee, expresso, french press
- Variety of the product: Beans, ground
- Accessories: coffee grinder, cups, etc
- Quality: fresh, inexpensive, accessible (local store)
- Branding: rustic, young, fun, etc. (who's your audience?)

Below is a series on coffee. Notice how no image is repeated and each one contributes to a 'story telling'.


Next tutorial: DIY Lighting tutorial for beginners
Upcoming Product Photography Webinars & Courses
|
